When the end of January arrives, we often look back at the resolutions we made a mere month ago, and have since given up. So how about setting a few productivity habits that are easy to stick to?
In this post, I'm sharing five productivity booster changes you can make to the way you use Alfred. Each one should only take you a couple of minutes to set up, and could save you far more time over the year.
1. Create a Custom Search
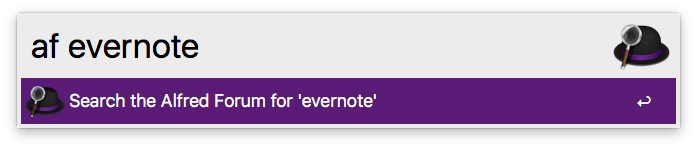
Think of documentation, wikis or any other site you search frequently. Could you speed up this research by creating a custom search for it?
With a custom search, you can type the keyword for the site followed by your search term, and press Return to launch the results page.
Take a look at our Guide for creating your own custom searches or pop by Alfred's preferences under Features > Web Search to get started.
Share your custom searches with colleagues and friends to save them time too!
2. Stop Repeating Yourself With Snippets
Take a good look at the phrases, links or email responses you use a lot.
How much time would you save by creating auto-expanding snippets for these? It's not just the time it takes to type out the text,it's also the mental energy expended thinking about your response, finding the right link and re-reading yourself to ensure you've answered correctly.
Pop by Alfred's Features > Snippets preferences and check "Automatically expand snippets by keyword" in the top right to get started. If you're new to text expansion, we've created a detailed help page on Snippets to guide you along.
Top tip: If you use Alfred's Clipboard History feature, you can select a text clip in the Clipboard Viewer and press Cmd + S to quickly save it as a snippet!
3. Set Up a File Filter
We accumulate vast amounts of data on our Macs, in more or less organised ways.
With a File Filter workflow, you can tell Alfred where to search, and which file types to include in your search.
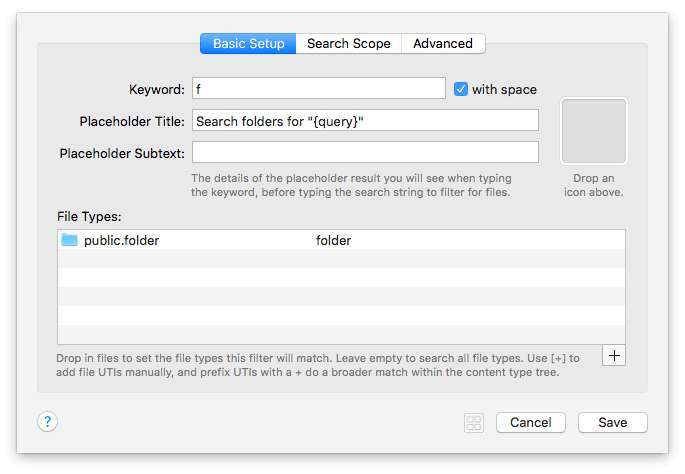
For example, you can create a file filter specifically for folders in your main "Work" folder, without the results being cluttered by non-work items.
Equally, you could create a filtered search for your Photoshop files only, saving you from fishing around various folders to find where you put those evasive client files!
Learn how to create your own File Filter Workflows or choose the "Simple Folder Search" example from the wide range of workflows built into Alfred.
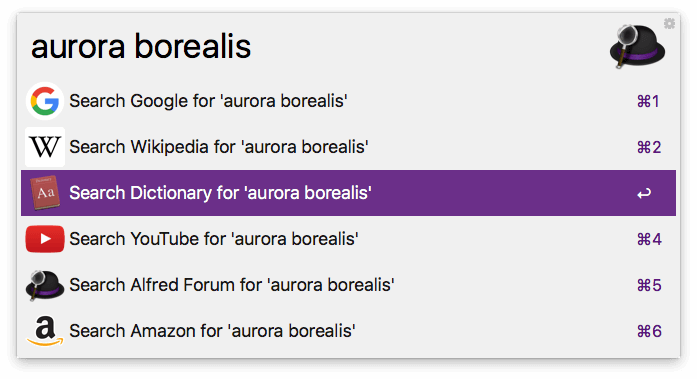
4. Set Up Your Fallback Searches
Fallback searches are the list of search options you see when you search for a keyword that doesn't match a result on your local Mac.
By default, these are Google, Wikipedia and Amazon, as these are the most commonly used web searches. With the Powerpack, you can customise these to be your most commonly used web searches or workflows.
Find out more about creating your own fallback searches or set them up in Features > Default Results, under "Setup fallback results".
5. Enable Query History
If you'd like Alfred to remember the last queries you typed, you can enable this in Alfred's Advanced preferences under "Store Typed Query History". You can also choose to show the latest one if you pop up Alfred within 5 minutes of your last query.

If you're already an Alfred pro, why not introduce a colleague to Alfred or one of the features you love most? After all, the more productive your team is, the more you will be too!
Some of the most useful workflows are the simplest.
In this post, you'll discover how to create a hotkey-based workflow which allows you to launch a web search for your current macOS selection or clipboard contents. It's an incredibly quick way of searching the web without re-typing your query, or manually launching a search.
First, let's take a look at my basic workflow.
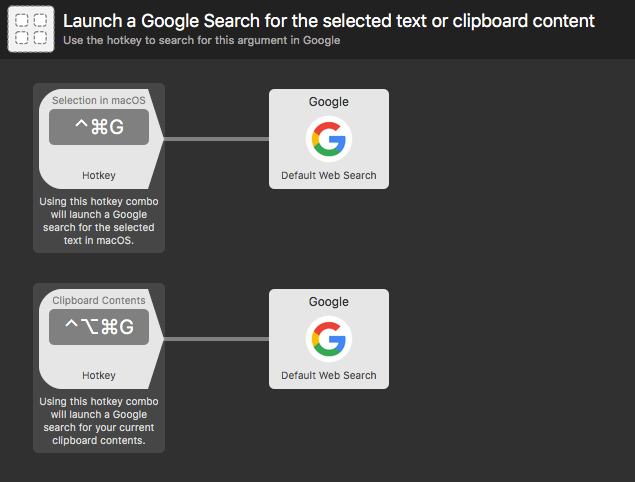
Each of these two workflow streams consists of two objects; A Hotkey Trigger and a Default Web Search Action.
Taking a look at the first stream at the top, the hotkey is configured to pass the Selection in macOS as argument.
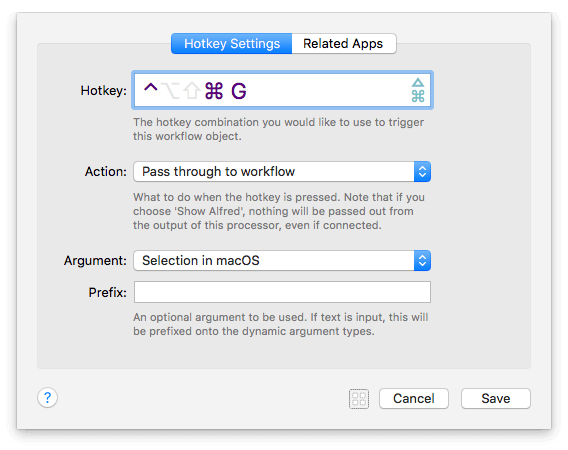
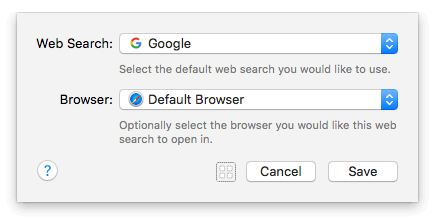
This means that, when text is selected in macOS, pressing the hotkey combination will pass this text on to the next object. In this instance, the next object is a Default Web Search, set to use Alfred's default Google Search and your default browser.
The Default Web Search object is left as default; Google web search, and default browser.
You've now created your first workflow stream, so select some text in macOS and press your hotkey combination to launch a Google search for that text in your default browser.
To create the second stream, select the first two objects, and copy and paste them below. Modify the Hotkey object slightly by setting a different hotkey combo, and choosing "Clipboard Contents" as argument. This hotkey will now trigger a Google search for the last text you copied to your clipboard!
Customising the Workflow
Now that you've created the workflow, you can add other streams and customise them as you need;
- Change the Default Web Search to another search engine like Wikipedia, Amazon, IMDB, Twitter, Google Images, etc.
- Use an Open URL Action with one of your own custom searches for your own work documentation or resources.
- Open the results in a specific browser, rather than your default one.
- Set the second object to be a different action like launching a custom URL where the argument becomes a {query} within your URL.
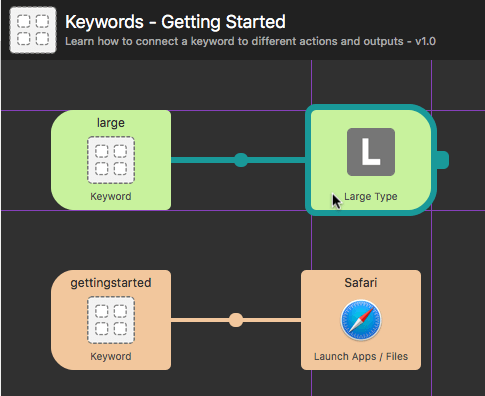
- Passing the argument to an Output object like Large Type or Write File.
Take a look at how these hotkey-based workflows can save you time and clicks as you go through your day, and create your own variations.
Today, we've released Alfred 3.5 which brings a new bookmarks feature, improvements to workflows and other features, as well as support for macOS 10.13 High Sierra, which is due to be released later today.
If you're upgrading to High Sierra, we've published a post with a few tips to ensure you get the smoothest experience with Alfred.
New Bookmarks Feature
Alfred 3.5 adds a new Bookmarks feature, where Alfred indexes and searches for your bookmarks, removing the dependence on the macOS metadata.
You can include results from both Safari and Google Chrome to your results, and can choose to either include bookmarks in your default results (more convenient) or prefix them with a keyword (lower results noise).
It's also up to you whether the bookmarks are opened in the bookmark's source browser, or always in your default browser.

If you previously included bookmarks in your default results, you'll need to re-enable them under Features > Bookmarks.
Note that this preference isn't synced between your Macs to allow different settings per Mac, so you'll need to enable it on each Mac respectively.
Smarter Fallback Searches
You may have noticed in the first screenshot above that the Fallback Searches are shown even though Alfred has found local results.
This improvement, available to Powerpack users, works particularly well if you include bookmarks in your default results, as you may want to search the web for your keyword even if you have a bookmark with the same keyword.
You can set this at the bottom of the Features > Default Results preferences.
And much more...
We've also made significant improvements to workflows, mostly based around script filters, so take a look at the Change Log for more details as well as the full list of additions to this latest release.
Today, Apple is releasing macOS High Sierra to the general public, after a period in beta.
Alfred is High Sierra ready, so grab Alfred 3.5 from the Update tab or from our website to make the most of it.
If you're ready to jump in with High Sierra, here are a few tips to make your experience as smooth as possible when using Alfred.
Give your Mac time to reindex
On installing High Sierra, your Mac may need a moment to rebuild its metadata index, which Alfred relies on to present you with file results.
You may find that your Mac's running at a higher CPU load during this time, but within an hour or so, indexing should be complete and both Spotlight and Alfred will be able to present you with file results.
Setting up Dropbox for Alfred's syncing
If you're setting up a Mac from fresh and intend to use Alfred's Preferences Syncing, give Dropbox sufficient time to download your existing files from the cloud.
Only once Dropbox has finished downloading, set up your Alfred sync folder to the same location as before to use your existing preferences.
Experiencing a bit of Alfred lag?
A small subset of Macs, primarily those with auto-switching graphics cards, may experience lag when using Alfred themes with high window blur. This can easily be fixed by choosing a theme with lower window blur.
If you're seeing this lag, first, ensure you've updated to Alfred 3.5. Go to Alfred's Appearance tab and choose any of the default themes or, if using custom themes, lower the window blur to less than half on your active theme.

Showing Bookmarks in results
If you previously included bookmarks in your default results, you'll need to re-enable them under Features > Bookmarks. This allows Alfred to show bookmarks from your Safari and Google Chrome browsers, even though macOS 10.13 no longer shares this metadata.
Note that this preference isn't synced between your Macs to allow different settings per Mac, so you'll need to enable it on each Mac respectively.
Enjoy High Sierra!
Once you've set up your Mac with High Sierra, be sure to activate your Powerpack license. You can buy a new license or upgrade your existing one here to make the most of Alfred's features.
We and our community members have been using Alfred on High Sierra betas for some time, so you can expect a smooth experience with Alfred 3.5 on High Sierra.
If you encounter any issues not covered above, drop us a tweet at @alfredapp and we'll be happy to help! :)
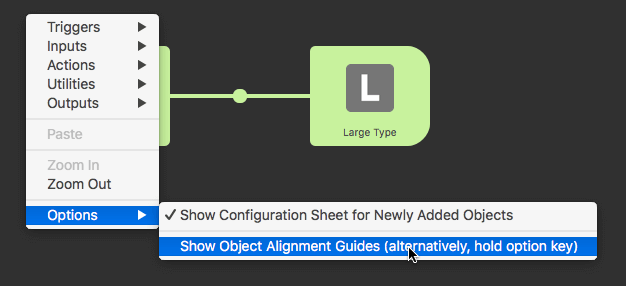
When creating workflows, did you know that you can use object alignment guides to make your workflows look all tidy? No more misaligned objects!
Hold the Option key to temporarily show vertical and horizontal guide lines around the object you're hovering over on the Workflows canvas. It makes it easier to work out whether your object is neatly lined up with neighbouring objects.
If you prefer to turn the alignment guides on to be visible without holding Option, right-click the canvas to reveal the Objects list. Choose Options > Show Object Alignment Guides, and the lines will now appear any time you hover over any workflow objects on the canvas.