One of the best tools in the productive Mac user's bag of tricks is undoubtedly hotkeys. We can all remember that first lightbulb moment where learning the basic shortcuts in OS X gave us that instant productivity boost!
With Alfred, you can kick this keyboard control into high gear. In this post, I've gathered ten of my favourite uses for hotkeys, so take a look at how you can improve your workday by adopting these tricks and creating a few handy hotkeys of your own.
In order to use some of the features below, you'll need the Powerpack.
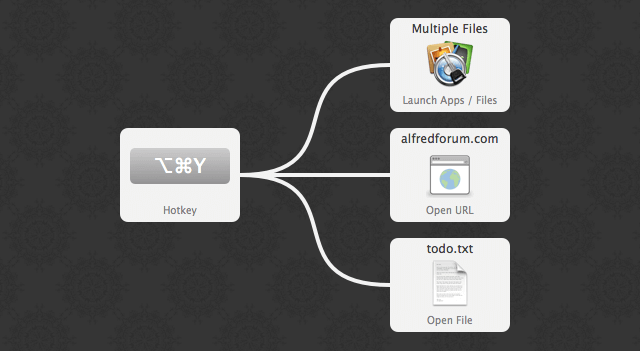
1. Launch applications, files or websites
Start your day with focus by using a hotkey to launch the websites, applications and files you need. For example, this workflow launches Mail and Safari, the Alfred forum and my to-do list text file, which makes it easy to kickstart my day while having my first coffee of the morning.
You can connect hotkeys to almost anything in a workflow, so there's no need to pop up Alfred and type a keyword.
2. Use the Cmd, Ctrl & Alt modifier keys with Return
When using Alfred's search box, pressing return will open the application, file or website you've selected. Using modifier keys, your return key can do more. Press the modifier keys and you'll see your results' subtext change to an alternative action.
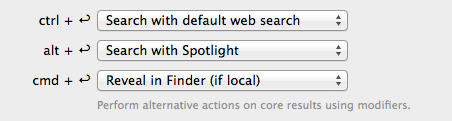
You can change what each modifier key does in the Advanced preferences tab.
3. Launch Alfred with a File Filter
Let's say you frequently search for PDF documents on your Mac. You can drastically speed up your search by using a hotkey to jump straight to a file filter workflow; No need to launch Alfred and type the keyword for your PDF search workflow.
Press your assigned hotkey to pop up the search box with the file filter already active. Your filter is identified by its icon on the left of the search box.

Download my PDF File Filter Workflow to see how simply you can create your own filters.
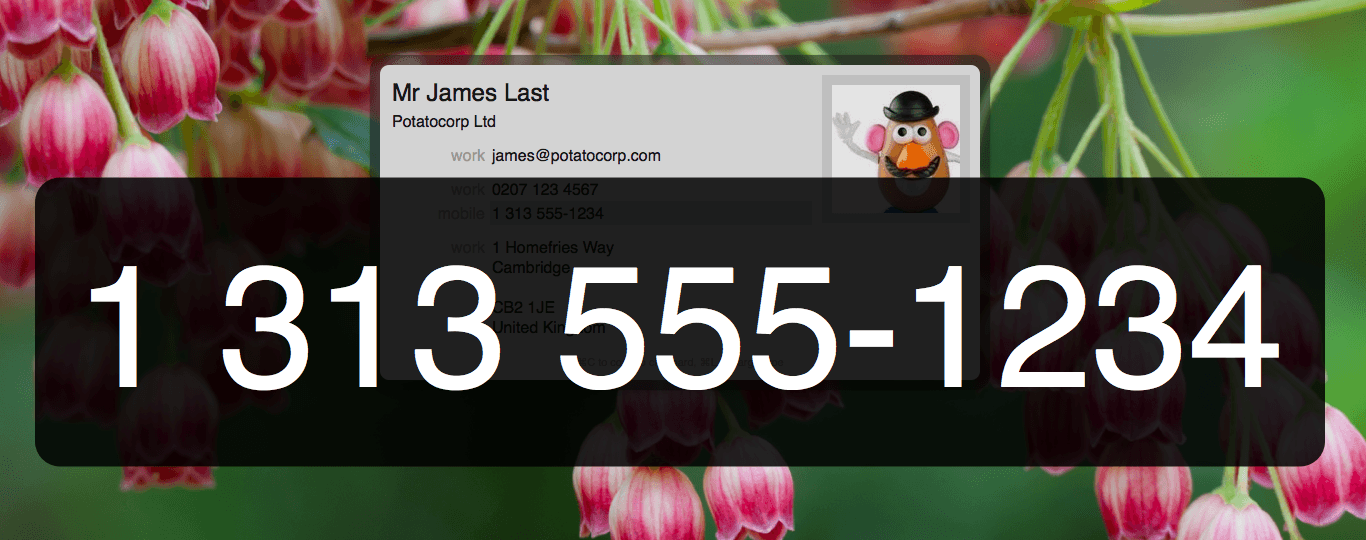
4. Large Type
Press Cmd + L to show any text in Alfred in large font across your screen. Handy for seeing phone numbers from across the room (or to share silly messages with everyone behind you in class!)
5. Paste as plain text
Paste text from the clipboard as plain text without showing the Clipboard Viewer with this handy little workflow.
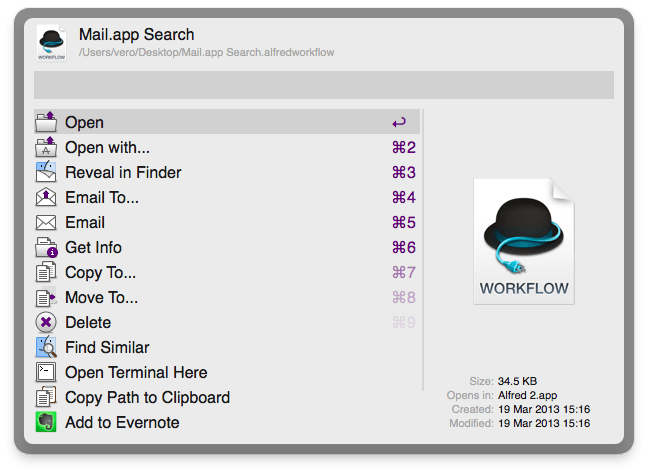
6. File selection
Found a file in Finder you need to take action on? Select the file and pop up Alfred's File Action panel with the Cmd + Alt + hotkey.
You can even create your own actions and add them to this panel with a "File Action" workflow object for tasks you repeat often.
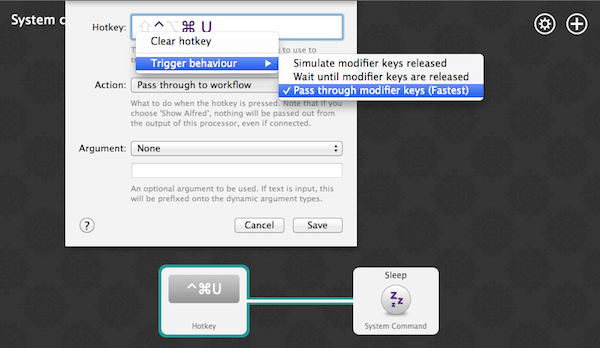
7. Speeding up hotkeys in workflows
This isn't a hotkey as such, but a way to make your existing workflow hotkeys perform their task even quicker.
To ensure that hotkeys always work smoothly on your Mac, Alfred waits a few milliseconds before letting the modifier keys (alt, cmd, ctrl) go before performing the action associated to your hotkey combination. If you want to speed this up, you can change the trigger behaviour to pass the modifier keys through and give you faster hotkeys.
Right-click on the hotkey field in your workflow object to show the hidden menu below.
8. Get to the Preferences quickly
Like most OS X applications, Alfred uses the standard Cmd + , (Cmd + comma) to open its preferences, so you can quickly put into action the new things you've learned here.
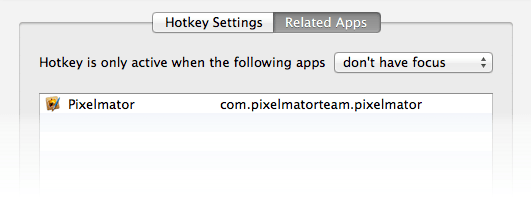
9. Contextual hotkeys
When setting a hotkey in your workflow, you can specify when you want the hotkey to be active by including or excluding applications. Just drag the related apps in!
10. File Buffer
If you need to take action on multiple files at once, the File Buffer is the best way to stack up the files you need before performing an action on all of them.
Use Alt + Up arrow to add a file to the buffer from Alfred's results and Alt + Right arrow to take action on all of them. For the full set of File Buffer shortcuts, go to the File Search > Buffer preferences or have a look at the File Buffer support page.
Fancy discovering more great productivity features? Have a look at our Tutorials section for tips, tricks and workflows you'll love.
Wondering why Andrew's been a little quiet on Twitter lately? He's been busy working away on something new you'll love. :)
Want to find out more? Head over here and sign up to get the first sneak peeks as soon as they're ready!
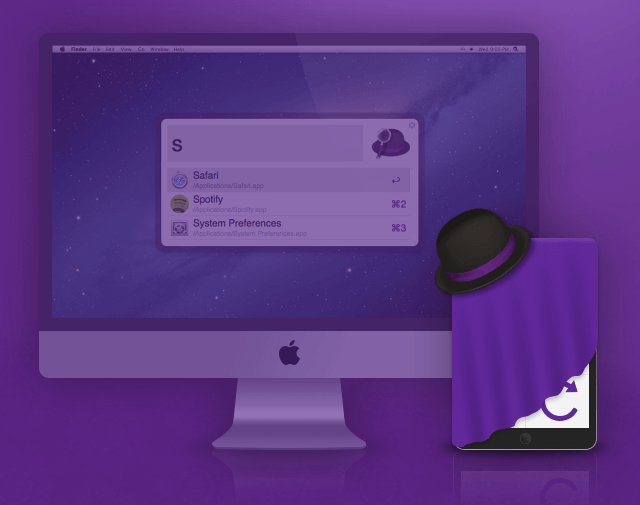
With Apple's exciting announcement of OS X Yosemite due in autumn, bringing some lovely visual improvements to your Mac, we thought we would create a beautiful new Yosemite-inspired theme for Alfred for you to download.
How to get the look
Install the Yosemite theme for Alfred v2 (You'll need the Powerpack for custom themes).
Simply click on the link above and the Alfred preferences will pop up to the theme tab. Click the "import" button and you'll be up and running with the new theme.
You can fine tune the theme in the Appearance preferences, go to the theme Options tab and tweak your visual settings to hide the Alfred hat and the preferences cog. The result subtext is also hidden in the screenshot above, which makes Alfred nice and clean looking.
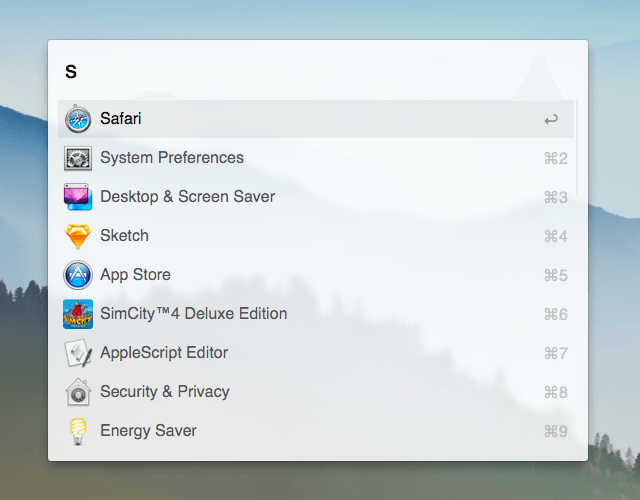
A fuzzy touch
Want the slick blur effect from the screenshot above? In Alfred 2.4, duplicate the Yosemite theme and customise it by turning down the opacity of the background. Then go to the Appearance Options and turn up the window blur to match the OS X Yosemite look.
Customising the theme
This theme was created using Alfred's theme editor in the preferences, so don't forget that once you've imported the theme, you can tweak it as you like. Whether you prefer a different colour, rounder corners or a larger look, you can make the theme your own.
In the theme preferences, here's how you can change the theme:
- Hold the Cmd key and hover over the various text and window areas to increase their size if you'd like a larger theme. Alternatively, hover over the corners to change the roundness.
- Hold the Alt key to change fonts or Ctrl to change all theme fonts to the one you're hovering over.
- Click anywhere on the theme to change the colour of text, backgrounds or separator lines.Feeling inspired?
You can find numerous themes and share your own on Packal, a user-created Alfred workflows and themes site by Shawn Rice, as well as in the Alfred forum's themes section.
As some of you know, Apple announced its next operating system, OS X 10.10 Yosemite today.
A few users have voiced concerns that Spotlight in Yosemite looks more like Alfred, and wonder whether this changes anything for Alfred and his future.
What you have to remember is that Spotlight's primary objective is to search your files and a small handful of pre-determined web sources. Meanwhile, Alfred's primary objective is to make you more productive on your Mac with exceptional and powerful features like Clipboard History, System commands, iTunes Mini Player, 1Password bookmarks, Terminal integration, fully bespoke and customisable user-created workflows and much, much more. These features allow you to mould Alfred to your unique needs, and this isn't going to change whether you use the free version of Alfred or the Powerpack.
In fact, we've been working on some pretty special and truly amazing new features that you'll hear about over the next few months. We think these will blow your mind and can't wait to tell you more.
Cheers,
Andrew & Vero
Everyone has an Alfred feature they couldn't be productive without. For me, it's Clipboard History.
Clipboard History is a Powerpack feature that has saved me hours of searching for links I'd copied or re-typing text. More than once, it also saved my bacon when my browser or text editor crashed, taking down with it all of my unsaved writing. Thankfully, anything I'd previously saved in Alfred's clipboard was readily available for me to paste in again.
If you're not already familiar with Alfred's clipboard, this tutorial post covers setting up and customising your Clipboard History settings, as well as creating Snippets for your most frequently used bits of text. Even if you think you're familiar with this feature, you might discover new and useful tips.
Using Clipboard History
One Alfred user called the Clipboard History "the best feature he never knew he needed"; It gives your OS X clipboard a memory so that you can dig through the links, addresses and other useful bits of text you've copied recently, making them easier to find and use again.
By default, the Clipboard feature is disabled for privacy reasons. To enable it, go to Alfred's Preferences under Features > Clipboard > History, and check the box next to "Persist for". You can then choose from the dropdown how long you'd like Alfred to remember your clips for.
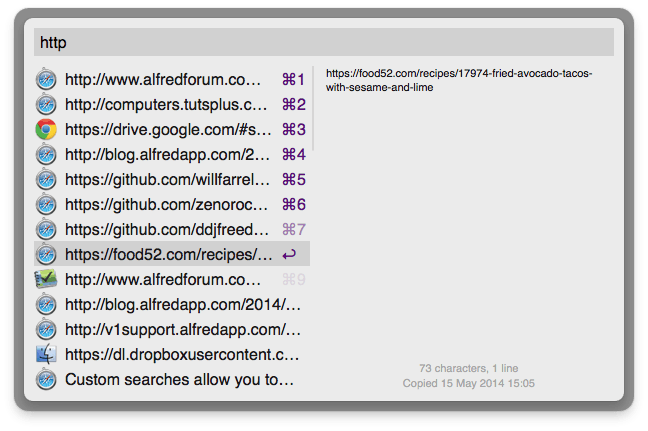
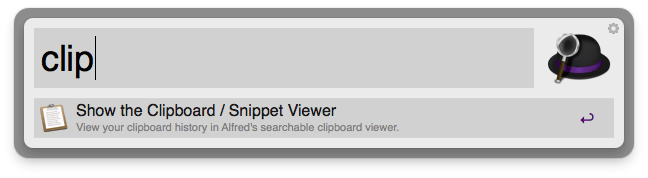
You can then show the Clipboard Viewer with a hotkey (Cmd + Alt + V by default) or by using the keyword "clipboard" in Alfred's search box.
The Clipboard Viewer contains the text snippets you've copied; You can search by scrolling through the latest 50 clips or by typing a part of your clipped text to narrow down your search to see the relevant clips.
As Alfred strips the formatting from the copied text, you can paste to the currently focused app by selecting the item you want in Alfred's Clipboard Viewer and hitting the return key without worrying about rogue formatting being pasted in. You can also copy the text back to your current clipboard with Cmd + C.
In the Clipboard preferences, you can choose which applications Alfred should ignore. By default, Keychain Acccess, SecurityAgent, 1Password and Wallet are ignored to ensure that no passwords are saved to your history. You can add to this list if you use a different password manager or want any other applications to be ignored.
Using Snippets
If you often use the same clipboard entries or find you're typing out the same information frequently (e.g. your address or a particular URL), you can save these bits of text to Snippets.
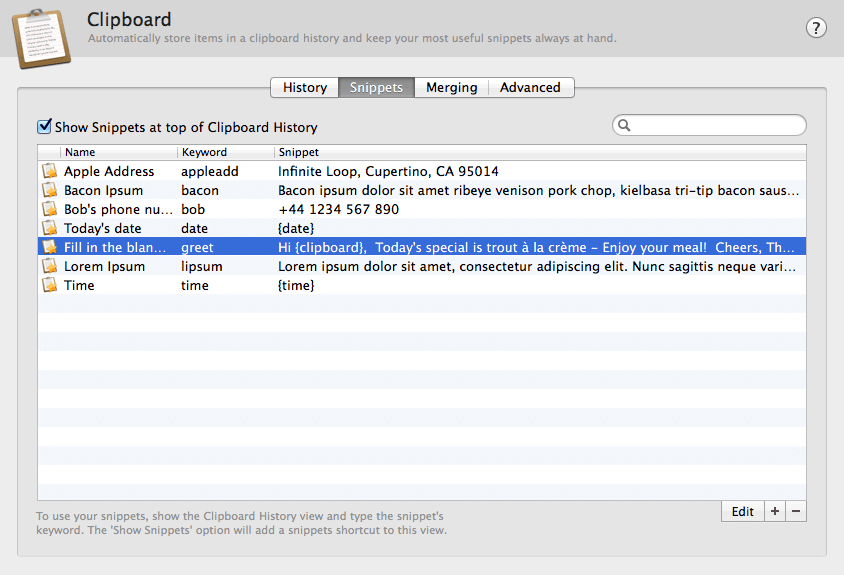
You can create these in Alfred's preferences, under Features > Clipboard > Snippets. Press the + button (or Cmd + N) to create a new snippet, or double-click an existing one to edit it. Give your Snippet a name and a keyword, then type or paste in the snippet text.
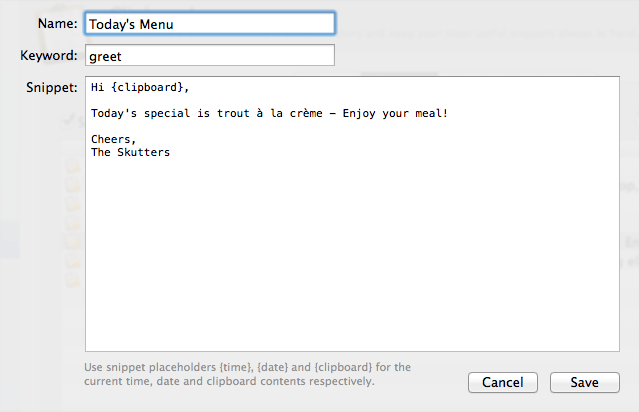
You can use placeholders within your snippets, so that dynamic content is entered. In the example above, {clipboard} would be replaced with the text in my clipboard.
The Date and Time placeholders use your OS X defaults. You can change these in your Mac's System Preferences > Language > Region > Advanced in Mavericks (or in Language & Text > Region settings in OS X 10.8):
- Date: {date}, {date:short}, {date:medium}, {date:long}, {date:full}
- Time: {time}, {time:short}, {time:medium}, {time:long}, {time:full}
The Clipboard placeholders allow you to quickly format the text while pasting it by uppercasing, lowercasing or capitalising the contents of your clipboard. Using {clipboard} by itself simply pastes the text as plain text.
- Clipboard: {clipboard}, {clipboard:uppercase}, {clipboard:lowercase}, {clipboard:capitals}
Advanced functionality
Once you've set up your Clipboard and Snippets, there are a few additional handy settings you can use.
Advanced users may want to turn on Clipboard Merging, which allows you to append the latest copied clipboard entry to the previously copied text by holding Cmd and double-tapping the C key. You'll need to switch this on in the Merging preferences.
Your snippets can also be synchronised if you have more than one Mac; Simply go to Alfred's Advanced Preferences to set up your Dropbox sync folder, and your snippets and many more settings will be synced between your Macs. You can also follow our detailed tutorial on syncing your settings.
You can find more Alfred tutorials on the blog and on our support site. The forum is also filled with great tips, workflows and custom themes from fellow Alfred users.